PhotobucketPhotobucketPhotobucketPhotobucketPhotobucketPhotobucket
Showing posts with label Chocolate. Show all posts

Thursday, April 14, 2011

Chocolate Peanut Butter Cupcakes


Chocolate and Peanut Butter.

Peanut Butter and Chocolate.

Has there ever two flavors that go together as well as these two do?

Ever since I tried the recipe for the Snickers cupcakes, I've had all sorts of ideas for how to stuff other candy bars into my cupcakes and when I saw a post for peanut butter cup cupcakes over at My Baking Addiction I was so excited. It was as if she was inside my head...I've also been thinking about doing this and now I had no excuse except to try it out for myself!

Caleb enjoying the frosting!
The result was amazing!

These cupcakes were delicious and the little peanut butter cup baked into the middle is a great little peanut-buttery surprise. My son especially loved the frosting...I found him licking it off with a big smile on his face and then digging out the peanut butter cup to snack on! I hope that you enjoy them.

(The cupcake batter is the same doctored-up box mix from the Snickers cupcakes, just updated for the Peanut Butter Cups, but the frosting is new and peanut-buttery deliciousness!)

Chocolate Peanut Butter Cup Cupcakes
Inspired by My Baking Addiction

Makes 24 cupcakes

Ingredients for the cupcakes:
1 package devil’s food cake mix
1 (5.9 ounce) package instant chocolate pudding mix
1 cup sour cream
1 cup vegetable oil
4 eggs; lightly beaten
1/2 cup warm water
1 teaspoon of vanilla
24 frozen Mini Reese's Peanut Butter Cups (must be frozen!)

Instructions for cupcakes:

1. Preheat oven to 350 degrees F.
2. Line (2) 12 cup muffin tins with paper liners.
3. In stand mixer, mix together the cake and pudding mixes, sour cream, oil, beaten eggs, vanilla and water.
4. Evenly divide the batter amongst the prepared pans.
5. Gently push a frozen mini peanut butter cup into the center of the batter and smooth the surface making sure to cover the candy bar with batter.
6. Bake for 18-22 minutes, or until top is springy to the touch and a wooden toothpick inserted comes out clean.
7. Cool cupcakes thoroughly on wire rack.

Ingredients for the frosting:
3 sticks of unsalted butter
1 cup creamy peanut butter
1 tablespoon vanilla extract
2 lbs powdered sugar
4 tablespoons milk

Instructions for the frosting:
1. In the bowl of a stand mixer, fitted with the paddle attachment, cream butter and peanut butter on medium speed until fluffy. (About 2 minutes)
2. Slowly add your powdered sugar, thoroughly mixing after each addition.
3. Add vanilla and 4 tablespoons of milk (use more or less milk depending on what consistency you like). Blend on low speed until moistened.
4. Beat at high speed until frosting is smooth and fluffy.
5. Put frosting onto cooled cupcakes and garnish as desired. I used the giant French pastry tip from Bake it Pretty and added 1/2 of a mini peanut butter cup to decorate.

Cupcakes will last for 2 days in a well secured container in the refrigerator. Any longer and they will start to get stale.

Cupcakes...they seem to be all around me lately! Every new recipe that I come up with seems to be centered around them...but don't worry, this will be my last post about them for awhile. I'm ready to try some new stuff! (And so are my friends and family's waistbands!)

Ps. Don't forget to enter my iTunes giveaway! It ends Sunday, April 17th.


Photobucket

I am linking this recipe up to: Fireflies & Jelly Beans, Transformation Thursdays, It's a Keeper Thursday, Recipe Swap Thursday, Full Plate Thursday, Sweet Tooth Friday, Social Parade, Hodgepodge Friday, Friday Favorites, Feature Yourself Friday, Foodie Friday, La Bella Vita, Show and Tell Saturday, Tatertots and Jello, Saturday Night Special,Meatless Mondays, Masterpiece Monday, Homemaker Monday, Strut Your Stuff, Motivate Me Monday, Just Something I Whipped Up, Made By You Mondays, Recipe Swap Sundays,Tempt My Tummy Tuesdays, Cupcake Tuesday, Tasty Tuesday, Tuesday's At The Table, Tip Me Tuesday, Get Your Craft On, Sweet Peas & Bumblebees, Whatever Goes Wednesdays,  

Wednesday, March 30, 2011

Chocolate Irish Cream Cupcakes


As I have been saying, I am completely and totally on a cupcake kick right now. So when my husband and I were invited to a St. Patrick's day party a couple of weeks ago I offered to make some cupcakes. Since this was an adult-only bash, I knew that the dessert needed to be some drunken cupcakes! And since it was an Irish party I knew that I needed to find a way to get my favorite liquor, Bailey's Irish Cream, into the cupcakes.

When I coming up with the recipe, not only did I find a way to add Irish Cream to it, but I also decided to fill it was a wonderful surprise: Irish Cream Chocolate Ganache.

The cupcakes turned out absolutely decadent and rich. And they were a hit at the party...Enjoy!


Chocolate Irish Cream Cupcakes

Makes 24 cupcakes

Ingredients for the cupcakes:

1 package devil’s food cake mix
1 (5.9 ounce) package instant chocolate pudding mix
1 cup sour cream
1 cup vegetable oil
4 eggs; lightly beaten
1/2 cup warm water
1 teaspoon of vanilla

Instructions for cupcakes:

1. Preheat oven to 350 degrees F.
2. Line (2) 12 cup muffin tins with paper liners.
3. In stand mixer, mix together the cake and pudding mixes, sour cream, oil, beaten eggs, vanilla and water.
4. Evenly divide the batter amongst the prepared pans.
5. Bake for 18-22 minutes, or until top is springy to the touch and a wooden toothpick inserted comes out clean.
6. Cool cupcakes thoroughly on wire rack.

Ingredients for Chocolate Ganache:
8 oz. bittersweet chocolate - chopped
2/3 cup heavy whipping cream
2 tablespoons butter at room temperature
2 teaspoons of Irish Cream

Instructions for Chocolate Ganache:
1. Heat the whipping cream until simmering and pour it over the chocolate in a heat safe bowl.
2. Let it sit for one minute and then stir until smooth. (If this has not sufficiently melted the chocolate,  microwave for 20 seconds and stir until melted.)
3. Add the butter and Bailey's Irish Cream and stir until combined.

Filling the Cupcakes:
1. Let the ganache cool until thick but still soft enough to be piped (the fridge will speed this along but you must stir it every 10 minutes)
2. Meanwhile, using an apple corer, cut the centers out of the cooled cupcakes. You want to go most of the way down the cupcake but not cut through the bottom, about 2/3 of the way.
3. Put the ganache into a piping bag with a wide tip and fill the holes in each cupcake to the top.

Ingredients for Frosting:
3 sticks unsalted butter
1 tablespoon vanilla
1 small pinch of salt
2 lbs powdered sugar
4 tablespoons Bailey's Irish Cream

Instructions for Frosting:
1. In large mixing bowl whip butter until light and fluffy (a few minutes should do the trick)
2. Slowly add in the powdered sugar, mixing well between each addition.
3. Add in the salt, vanilla, and Irish Cream with mixer at low speed until these ingredients are incorporated.
4. Beat frosting at high speed until it is smooth and fluffy.

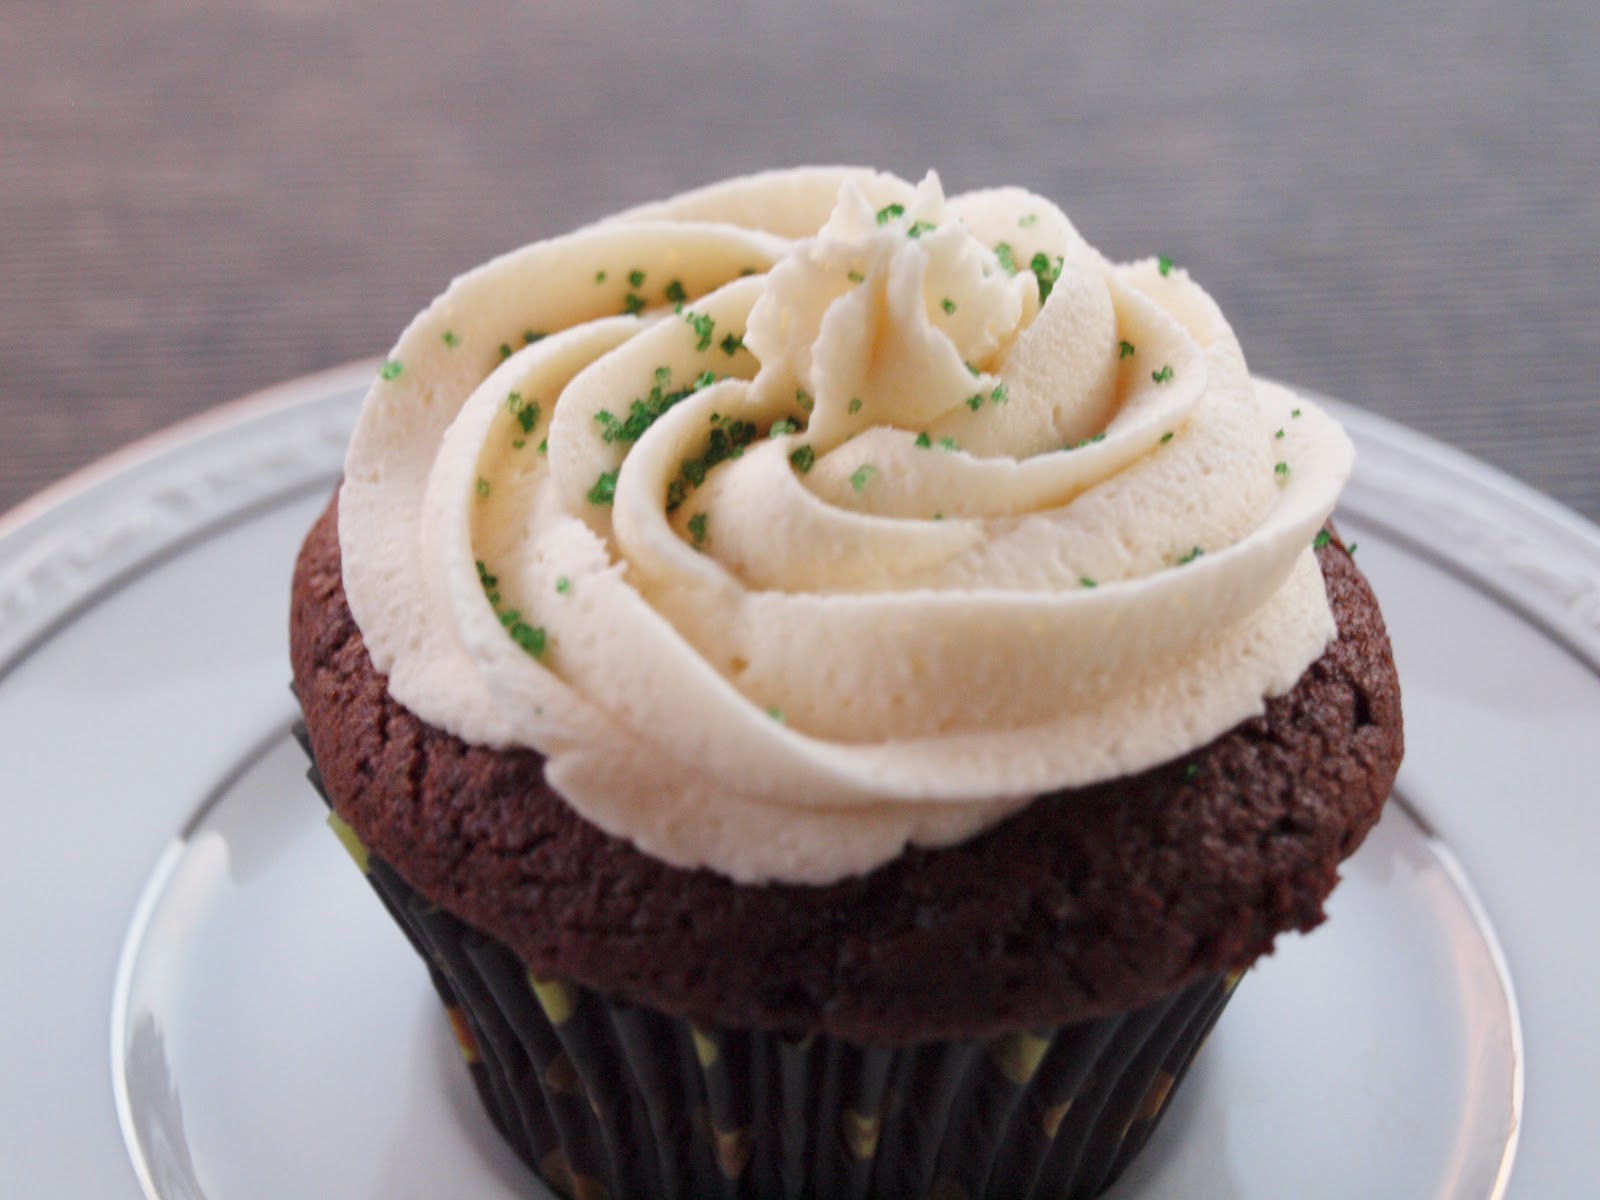
I frosted my cupcakes with a Wilton 1M Star tip and garnished it with green sanding sugar. Cupcakes will stay fresh for up to two days in an airtight container in the refrigerator.


I am linking up to: Blue Cricket DesignThe Trendy Treehouse, Sugar & Dots, Someday Crafts, This Weeks Cravings, bouffe e bambini: Handmade Hog, Night Owl Crafting, Fireflies & Jelly Beans, Transformation Thursdays, Strut Your Stuff Thursday, Recipe Swap Thursday, It's a Keeper Thursday, Simply Sweet Home, It's A Hodgepodge Friday, Feature Yourself Friday, WhipperBerry, Foodie Friday

Tuesday, March 22, 2011

Snickers Cupcakes


So lately I have been on a cupcake kick. A BIG cupcake kick. I have been sampling recipes I have found in the interwebs and from cookbooks. And let me tell you that I have been very popular with my co-workers, family and neighbors as they have been helping me by "sampling" what I have been making.

I found this recipe over at my favorite baking site, My Baking Addiction. They are incredibly easy to make and when presented they have a definite "WOW" factor! Everyone loved these cupcakes with a few people claiming that they were the best cupcakes that they have ever eaten.

The cupcakes are made with a cake mix, but are doctored up to be incredibly moist and dense. The surprise that you will find is the Snickers candy bar baked inside...making this cupcake a candy bar lover's dream! They are then topped off with homemade caramel buttercream frosting and garnished with more caramel and Snickers. YUMMY!

They are definitely a keeper and are something that I will pull out whenever I need to impress some guests...I hope that you enjoy them!


Snickers Cupcakes
Inspired by My Baking Addiction

Makes 24 cupcakes

Ingredients for the cupcakes:

1 package devil’s food cake mix
1 (5.9 ounce) package instant chocolate pudding mix
1 cup sour cream
1 cup vegetable oil
4 eggs; lightly beaten
1/2 cup warm water
1 teaspoon of vanilla
24-30 frozen Snickers Miniatures (must be frozen!)

Instructions for cupcakes:

1. Preheat oven to 350 degrees F.
2. Line (2) 12 cup muffin tins with paper liners.
3. In stand mixer, mix together the cake and pudding mixes, sour cream, oil, beaten eggs, vanilla and water.
4. Evenly divide the batter amongst the prepared pans.
5. Gently push a frozen Snickers Miniature bar into the center of the batter and smooth the surface making sure to cover the candy bar with batter.
6. Bake for 18-22 minutes, or until top is springy to the touch and a wooden toothpick inserted comes out clean.
7. Cool cupcakes thoroughly on wire rack.

Ingredients for the buttercream frosting:
3 sticks butter; room temperature
2 teaspoons vanilla extract
1 1/2 pounds confectioners’ sugar
1/3 cup caramel topping; plus more for drizzling
12 Snickers Miniatures, cut in 1/2 diagonally to garnish

Instructions for the frosting:
1. Cream the butter in the bowl of a stand mixer. Add the vanilla extract and caramel syrup and combine well.
2. Add the sugar in slowly, thoroughly mixing after each addition. For thicker frosting you can gradually add in a little more sugar.
3. Frost your cupcakes. I used a Wilton 1M star tip for my cupcakes.
3. Garnish with Snickers bars and a drizzle of caramel of caramel syrup. Make sure that you add your Snickers bars to the frosting shortly after applying it or they will not stick in the frosting well.

(Cupcakes will last for 2 days in a well secured container. Any longer and they will start to get stale.)


I'm linking up this week to: Fireflies & Jelly Beans, It's a Keeper, This Week's Cravings, Prairie Story, Somewhat Simple,Tip Junkie, Cupcake Tuesday, Someday Crafts, Sweet Tooth Friday, I'm Lovin' It, Food on Fridays,Simply Sweet Home, Fingerprints on the Fridge, WhipperBerry, It's a Hodgepodge Life, My Romantic Home

Thursday, January 13, 2011

Chocolate Caramel Cookies

This past holiday season,  I was looking for something very special to make for Santa when he visited our house. The recipe that I decided on was one that I had seen in a few different places over the internet throughout the year. It was a recipe for a decadent looking cookie that had all that I knew both Santa and I love...chocolate and caramel.

And let me tell you...these babies are Ah-maz-ing! They are moist, chewy and absolutely delicious...and, one of my favorite cookies from the past year. (If not one of my favorite's ever!) And, I for one know that Santa feels the same way!

Chocolate Caramel Cookies

Ingredients
  • 1 cup Sugar
  • 2 whole Eggs
  • 2 teaspoons Vanilla
  • 1 cup Brown Sugar, Packed
  • 1 cup Butter, Softened
  • 2 ½ cups Flour
  • 1 teaspoon Baking Soda
  • ¾ cups Baking Cocoa
  • 1 bag Rolo Candies (12 Ounce Bag)
  • ½ cups Sugar
Directions

1) Preheat oven to 375 degrees.
2) In a large mixing bowl, blend 1 cup sugar, eggs, vanilla, brown sugar, and butter.
3) In a separate bowl, mix flour, baking soda and cocoa.
4) Add the flour mixture to sugar mixture very slowly until thoroughly mixed.
5) Refrigerate dough for 30 minutes.
6) While dough refrigerates, unwrap Rolo candies and place in a bowl.
7) Place 1/2 cup of sugar in a separate bowl.
8) Once dough is refrigerated, remove dough (one tablespoon at a time) and flatten slightly in your hand. Place a Rolo in the center and form dough around it. Roll into a ball with your hands, drop into the bowl of sugar, and roll to coat it. Place balls of dough on cookie sheet.
9) Bake cookies for 7-10 minutes or until center falls flat and dough crackles.


Sunday, January 2, 2011

Coconut Chocolate Blondies

On a grocery shopping trip just before Christmas, on a whim I picked up a bag of sweetened flaked coconut. It is not something that I usually keep in my pantry...my husband and son are not fans of it. Me on the other hand, I absolutely love coconut. So when I needed to make one more goodie to finish up my yearly holiday baking gifts for friends and neighbors, this was the recipe that I immediately thought of. I had come across it a few months earlier over at Brown Eyed Bakers and I knew that I had everything in my pantry for it without having to go to store for anything!

I tweaked the original recipe a little and I think that they turned out great...but you really can't go wrong with a blondie recipe! It's the great thing about blondies, you don't need any fancy kitchen equipment. Just a wooden spoon, the ingredients and a couple of bowls. Easy to make, they always turn out awesome and they are a crowd pleaser.


Coconut Chocolate Chunk Blondies 

Inspired by Brown Eyed Baker

Ingredients
  • 1 cup all-purpose flour
  • 1/8 teaspoon salt
  • 4 ounces butter, melted and cooled to room temperature
  • 1 cup light brown sugar
  • 1 large egg
  • 1½ teaspoons vanilla extract
  • 1 cup sweetened flaked coconut
  • 1 cup chocolate chips or chunks
  • More Coconut-for sprinkling on the top of the bars.

Directions

1. Preheat oven to 350°F. Spray an 8-inch square baking pan with cooking spray.
2. Combine the flour and salt & set aside.
3. Stir together the melted butter and brown sugar until smooth and creamy; beat in egg and vanilla extract until well blended.
4. Slowly beat in the flour and salt mixture until just blended. Next, stir in the coconut and chocolate chips. Scrape the batter into the pan. Make sure the batter is spread evenly, smooth with a spatula. Sprinkle extra coconut on top of the bars.
5. Bake for 25-30 minutes, or until set in the center but still soft. Do not overbake the bars. Let cool slightly before serving. Cut the bars into squares and enjoy!


Photobucket

handmade projects 

CreativeShareWednesdays

Tasty Tuesdays

Tuesday, December 21, 2010

Chocolate Marshmallow Sandwich Cookies

The holiday baking for this season seemed to go on, and on, and on...Usually my husband helps me, but he worked this entire weekend so it was just me and the little one doing our best to get it all done. I also have been feeling a little bit under the weather, so I definitely didn't do quite as much as I typically do each year. But I did get the chance to try a few new recipes that I have been collecting throughout the year.

The first of my new recipes was an easy little sandwich cookie. What I like best about the cookie is that it makes a great impression on anyone that you give it too and it is very simple to make because it is made with a boxed cake mix. You can dress it up like I did with some holiday sprinkles, or roll it in crushed peppermint candies for an even more festive touch. You can use store-bought frosting or make your own...it's completely up to you!

Chocolate Sandwich Cookies

For the Cookie:

  • 2 whole Large Eggs
  • ½ cups Vegetable Oil
  • ¼ cups All-purpose Flour
  • 1 box Devil's Food Cake Mix, 18.25 Oz
1) Preheat oven to 350ºF.
2) Lightly whisk eggs and oil in a medium bowl.
3) Mix in flour and cake mix until well blended.
4) Roll into 1 inch balls (squish them down a little to flatten) and bake for 8-10 minutes on an ungreased cookie sheet.
5) Cool completely on a wire rack.

For the Filling:
You can either make your own favorite frosting or use a store bought pre-made frosting. It's your choice!

I made my own frosting...here is my recipe for my favorite marshmallow flavored one!
  • 1 package Reduced Fat Or Regular Cream Cheese, Softened (8 Ounces)
  • 1 jar Kraft Marshmallow Creme (7 Ounces)
  • 1 teaspoon Vanilla Extract
1) In the bowl of an electric mixer, beat cream cheese, marshmallow creme and vanilla extract until well blended.
2) Spread about 2 Tablespoons of frosting onto the bottom of one cookie and then place another cookie on top, bottom sides facing in.
3) Repeat with remaining cookies and frosting.

Enjoy!


Saturday, December 18, 2010

Buttons - A Kid-Friendly Holiday Recipe

Last night I began embarking on my annual Christmas baking. It is a huge endeavor. It is usually planned out for about a week. Shopping must be done. Lists must be made. And hours are spent in the kitchen. This year, however I have an extra pair of hands to help me. My little munchkin. He just loves to help mommy bake in the kitchen...mostly because he likes to taste test everything and lick the beaters. I don't blame him though...if the batter & frosting didn't go straight to my hips (and thighs...and belly...and ass) then I would be doing the exact same thing!

Since I have a little helper this year, I had to modify my usual list of goodies to include some items that are very kids friendly. Things that are easy for the little hands to help out with. The first of my posts about Christmas goodies is a little recipe called Buttons. It is a very simple (but yummy!) recipe that uses only 3 ingredients and your little ones will have so much fun making them!


Buttons

Ingredients
  • 70 Round or Checkerboard Pretzels
  • 70 Hershey Kisses
  • 70 Red & Green M&M's
Directions:
1) Preheat oven to 200 degrees
2) Place pretzels on a baking sheet
3) Top each pretzel with an unwrapped Hershey's Kiss
4) Place in oven for 5 minutes to soften the kisses. (Note: the kisses will not lose their shape)
5) Press a M&M on top of each Kiss
6) Let your "Button" sit and the chocolate of the kiss harden back up. Enjoy!

These are really good and a great holiday project that the kids will have so much fun making. You can modify it for different holidays all year round! Use the red & pink M&M's for Valentines day; Use the Easter or Halloween ones during their seasons; Or you could use different types of Kisses (caramel, hugs, etc.) The possibilities are practically endless!

Enjoy!

Thursday, December 2, 2010

Fudge Junior Mint Cupcakes

A couple of months ago I came across a recipe over on Picky Palate for her Chocolate Fudge Jr Mint Centered Cupcakes and I knew that I wanted to someday make them. Because, as Kramer from Seinfeld says,  
"Who's gonna turn down a Junior Mint? It's chocolate, it's peppermint -- it's delicious!"
So, earlier this week when I picked my son up from Preschool he mentioned that he had cupcakes for someone's birthday and that he wanted to make cupcakes at home with me...I knew that I had the perfect time to try this recipe out!

On our way home we stopped at Walgreens and picked up a couple of boxes of Junior Mints and away we went to have our cupcake adventure! We had so much fun and this is definitely a recipe to try with your kids...the will have a blast helping you stuff the insides of the cupcakes with Junior Mints. (All the while sneaking a couple for themselves!)

Chocolate Fudge Jr Mint Centered Cupcakes
Adapted from Picky Palate
  • 1 box Chocolate Fudge Cake Mix
  • 4 eggs
  • 1/2 Cup vegetable oil
  • 1/2 Cup water
  • 1 small box instant chocolate pudding mix
  • 1/2 Cup sour cream
  • 1 Cup Dark Chocolate Mint Chips*
  • 3 4 oz boxes Junior Mints
  • Favorite Vanilla or Cream Cheese Frosting
Directions
1) Preheat oven to 350 degrees F.
2) In a stand or electric mixer, add the cake mix, eggs, oil, water, pudding mix, sour cream and chocolate chips.
3) Mix on medium for 2 minutes or until well combined and somewhat thick.
4) Scoop into 24 paper lined muffin cups.
5) Press 3 JR mints into the center of each cupcake center.
6) Bake for 22-25 minutes or until toothpick comes mostly clean from center.
7) Let cool completely and frost with your favorite vanilla or cream cheese frosting & garnish with a Junior Mint.
Makes 24 cupcakes

*Note: The Dark Chocolate Mint Chips are a special holiday chocolate chip from Nestle Tollhouse

Enjoy!


giveaways


Sunday, August 8, 2010

Oatmeal Chocolate Toffee Bars


So, as if you couldn’t already tell I LOVE to bake. I really, really love it. It is my way to relax and work through stuff in my head. When I’ve had a bad day or if I am going through a really rough time I head into the kitchen. I go through my stack of recipes that I have collected through the years, or I head to the Internet to check out my favorite recipe websites and blogs. Sometimes even just looking through the recipes is enough to make the day better. I know it sounds crazy, but it’s just how I work through stuff.

I also love to experiment in the kitchen and a couple of weeks ago I was in one of my experimenting phases and I knew that I needed to get into the kitchen. Over and over lately I had been thinking about making oatmeal cookies…but I decided to take the classic oatmeal cookie and make it into something more. Here is what I came up with!

Oatmeal Chocolate Toffee Bars

Ingredients:
  • 1 cup Butter, Softened
  • 1 cup Light Brown Sugar, Packed
  •  2 whole Eggs
  • 1 teaspoon Vanilla Extract
  • 1-½ cup All-purpose Flour
  • 1 teaspoon Baking Soda
  • ½ teaspoons Ground Cinnamon
  • ½ teaspoons Salt
  • 1-⅓ cup Heath Toffee Bits, Divided
  • 3 cups Quick-cooking Or Regular Rolled Oats 
  • 1 12 oz. package of Milk Chocolate chips
Directions:
1. Heat oven to 350°F. Grease 13x9x2-inch baking pan.

2. Beat butter and brown sugar in large bowl until well blended. Add eggs and vanilla; beat well.

3. Stir together flour, baking soda, cinnamon and salt. Gradually add to the butter mixture, beating until blended. Set aside 1/4 cup toffee bits. Stir remaining toffee bits, chocolate chips and oats into the batter (batter will be stiff). Spread batter into prepared pan; sprinkle reserved 1/4 cup toffee bits over the surface.

4. Bake 25 minutes or until wooden pick inserted in the center comes out clean. Cool completely in the pan on a wire rack. Cut into bars. Makes about 36 bars.


These bars are really so delicious...my hubby loved them and I even caught a few of my co-workers taking second helpings! I really think that it is cinnamon in them that takes them over the top. I hope that you take the time to make this...you won't be disappointed. Enjoy!


Friday, July 23, 2010

Death By Chocolate

So about a month ago we had some good friends over for dinner. We don't get the chance to entertain very often, mostly because my schedule and hubby's schedule don't seem to match up very often. But, when we do get to have friends over we always have such a good time! And, our guests always get to be introduced to (or have to endure) at least one new recipe and this time, it was a dessert that I choose because I had most of the ingredients on hand, but also because I was so intrigued by the name of the recipe. 

Death By Chocolate was the name, and if you ask me, if it's time for me to go being killed by chocolate would not be a bad way to go at all! 

The recipe calls for the following ingredients:

  • 8 whole Regular Size Heath Bars Or Butterfinger Bars (I used 4 of each)
  • 1 box Brownie Mix (19.8 Oz. Box)
  • Ingredients Needed to Make Brownies
  • 2 boxes Instant Chocolate Pudding (1.4 Oz. Box, I Used Fat Free/Sugar Free)
  • 4 cups Milk, More or Less As Directed On Pudding Package
  • 16 ounces, weight Cool Whip 
Directions:
Prepare brownies according to package directions. Allow to cool and cut up into 1- to 2-inch squares.

Toss candy bars in the freezer for approximately 20 minutes. Remove from freezer, unwrap and place in a zip lock bag. Pound with a rolling pin until the bars are broken into pieces.

Mix pudding with the required amount of milk according to package directions.

In a glass trifle bowl, layer 1/2 of the cake cubes, 1/2 of the pudding, 1/2 of the crushed candy bars, and 1/2 of the whipped topping. 

Repeat layers in the same order, saving a last little bit of candy bar crumbles to sprinkle on top before serving.

Cover and refrigerate for several hours. Serve and enjoy! (Link to original recipe)


I really enjoyed this dessert, but a little bit of it definitely went a long way and this serves a lot of people. The only change that I would make would be to use less Cool Whip next time, it seemed to kind of overpower the rest of the flavors.

So, if you are looking for a chocolate desert that is fancy to look at, easy to make and the kids can help you put together this is one you should try!

Monday, April 12, 2010

Momma said there'd be days like this...

It's Monday, nothing is going how I would like it too and I feel like I need one of these....


Chocolate, frosting and Tylenol. It seems to be a cure all for me. And then I think that I will wash it all down with a large glass of red wine. Sound good?
 
Blog Design by Likely Lola